Do you have info on the pull down?We made the above fireplace TV work in our great room and porch. It’s not too high in the great room and I got a pull down mount for the porch.
View attachment 149821View attachment 149822


No forums found...
Site Related
Iowa State
College Sports
General - Non ISU
CF Archive
Install the app
How to install the app on iOS
Follow along with the video below to see how to install our site as a web app on your home screen.
Note: This feature may not be available in some browsers.
A/V setup
- Thread starter dmclone
- Start date
No forums found...
Site Related
Iowa State
College Sports
General - Non ISU
CF Archive
You are using an out of date browser. It may not display this or other websites correctly.
You should upgrade or use an alternative browser.
You should upgrade or use an alternative browser.
Sure do!
 www.mantelmount.com
The Perfect Pull Down TV Mount Above Your Fireplace
MantelMount is an award-winning above fireplace pull down TV mount that brings your TV down to eye-level & swivels to the best viewing position.
www.mantelmount.com

My wife and I want to get a projector so we can watch movies outside with the kids but then it will also be the source of my sports streaming in the shed when I tinker around.
Any recommendations?
Any recommendations?
Short throws seem to be the trend. https://www.rtings.com/projector/reviews/best/short-throwMy wife and I want to get a projector so we can watch movies outside with the kids but then it will also be the source of my sports streaming in the shed when I tinker around.
Any recommendations?
On a side note, AI has made cabling a lot less challenging. For example:
This document outlines the optimal HDMI connections for your Denon AVR-X1400H, Sony PS5, Samsung QN90D (85"), and Google TV Streamer 4K, especially for a 3.1 speaker setup and maximizing PS5 gaming features.
This document outlines the optimal HDMI connections for your Denon AVR-X1400H, Sony PS5, Samsung QN90D (85"), and Google TV Streamer 4K, especially for a 3.1 speaker setup and maximizing PS5 gaming features.
2. Recommended HDMI Connections
To get the best of both worlds (full PS5 gaming features and centralized audio through your Denon receiver), follow these connections:- Sony PS5 to Samsung QN90D (Direct Connection for Gaming Features):
- Connect a high-quality HDMI 2.1 certified cable from the HDMI OUT port on your PS5 to an HDMI 2.1 input port(port2) on your Samsung QN90D TV.
- Why this connection: This bypasses the Denon's HDMI 2.0 limitations and allows your PS5 to send its full 4K/120Hz, VRR, ALLM, and HDR signals directly to your capable TV, ensuring the best possible gaming visuals.
- Google TV Streamer 4K to Denon AVR-X1400H:
- Connect an HDMI cable from the Google TV Streamer to any available HDMI Input (HDMI2/MEDIA PLAYER", etc.) on the back of your Denon AVR-X1400H receiver.
- Why this connection: The Google TV streamer does not require 4K/120Hz or VRR. Connecting it to the Denon allows the receiver to handle its audio decoding (including Dolby Atmos from streaming services via Dolby Digital Plus) and pass the 4K/60Hz HDR video to your TV.
- Denon AVR-X1400H to Samsung QN90D (Single Cable for Audio & Other Video):
- Connect a high-speed HDMI cable (supporting ARC) from the HDMI OUT (ARC) port on your Denon AVR-X1400H to the HDMI ARC/eARC port(Port 3) on your Samsung QN90D TV.
- Why this connection:
- This single cable sends the video from the Google TV Streamer (which is connected to the Denon) to your TV.
- Crucially, the ARC (Audio Return Channel) feature allows audio from your PS5 (which is connected directly to the TV) to be sent back from the TV to the Denon receiver for playback through your 3.1 speaker system.
- It also allows audio from your TV's built-in smart apps (if you use them) to be sent to the Denon for playback.
3. Important Configuration Steps
After making the physical connections, configure your devices:On Your Denon AVR-X1400H:
- Power On the receiver.
- Press the "Setup" button on your Denon remote to bring up the on-screen menu on your TV.
- Input Assignment: Ensure the HDMI input you used for the Google TV Streamer is correctly assigned and named (e.g., "Streamer").
- Speaker Setup: During the setup, indicate that you have a "3.1" speaker configuration. The receiver will guide you to confirm your Front Left, Center, Front Right, and Subwoofer speakers.
- Audyssey MultEQ XT Calibration:
- Plug the Audyssey microphone into the front of the Denon receiver.
- Follow the on-screen instructions to place the microphone at your main listening position and several other spots.
- This process is critical for:
- Balancing speaker volumes.
- Setting correct speaker distances/delays.
- Determining optimal crossover frequencies for your 3.1 setup (ensuring your subwoofer handles low frequencies and your main speakers handle mid-range/treble effectively).
- Applying room equalization for the best sound quality in your specific room.
- HDMI Control (CEC): Enable "HDMI Control" or "CEC" in the Denon's setup menu to allow devices to communicate (e.g., turning on one device turns on others).
On Your Samsung QN90D TV:
- Power On the TV.
- HDMI-CEC (Anynet+): Go to your TV's settings and enable "Anynet+" (Samsung's name for HDMI-CEC). This allows the TV to control the Denon and other connected devices.
- Audio Output: In the TV's audio settings, set the digital audio output to "HDMI ARC" or select your "Receiver" as the audio output device, rather than "TV Speakers".
- Digital Output Audio Format: For the best audio quality from your PS5 (and TV apps) being sent to the Denon via ARC, set the TV's digital output format to Dolby Digital. ARC doesn’t support DD+ and DD is most reliable
- Input Signal Plus (or similar): For the HDMI input where your PS5 is connected, enable "Input Signal Plus" or a similar setting in your TV's picture/input settings. This ensures the TV is ready for enhanced HDMI signals like 4K/120Hz and HDR.
On Your Sony PS5:
- Power On the PS5.
- Go to Settings > Screen and Video.
- Resolution: "3840x2160 (4K)".
- Enable HDR: Ensure this is turned "On".
- Enable 120hx output, VRR, ALLM: On
- Go to Settings > Sound > Audio Output.
- HDMI Device Type: Select "AV Receiver."
- Audio Format (Priority): Choose "Bitstream (Dolby)" or "Bitstream (DTS)". This will send a compressed multi-channel audio signal to your TV, which will then send it over ARC to your Denon. The Denon will decode this into your 3.1 surround sound.
- Enable HDMI Device Control (CEC): On
On Your Google TV Streamer 4K:
- Power On the streamer.
- Navigate to its audio settings.
- Ensure the audio output is set to a format that allows for surround sound (e.g., Dolby Digital Plus, Passthrough, or Auto) to be properly sent to your Denon receiver. Auto is probably best
- HDR=Enable Dolby Vision or HDR

Some great info. here, be sure to get some audio cable labels, dirt cheap, and label each cable before you plug it in to the receiver. If you have multiple speakers it helps a lot to have all cables labeled if you ever have to switch out the receiver or move it to a new location. Nothing worse than trying to figure out what cable goes to what speaker or component when a dark cramped space and try to plug it in.On a side note, AI has made cabling a lot less challenging. For example:
This document outlines the optimal HDMI connections for your Denon AVR-X1400H, Sony PS5, Samsung QN90D (85"), and Google TV Streamer 4K, especially for a 3.1 speaker setup and maximizing PS5 gaming features.
2. Recommended HDMI Connections
To get the best of both worlds (full PS5 gaming features and centralized audio through your Denon receiver), follow these connections:
- Sony PS5 to Samsung QN90D (Direct Connection for Gaming Features):
- Connect a high-quality HDMI 2.1 certified cable from the HDMI OUT port on your PS5 to an HDMI 2.1 input port(port2) on your Samsung QN90D TV.
- Why this connection: This bypasses the Denon's HDMI 2.0 limitations and allows your PS5 to send its full 4K/120Hz, VRR, ALLM, and HDR signals directly to your capable TV, ensuring the best possible gaming visuals.
- Google TV Streamer 4K to Denon AVR-X1400H:
- Connect an HDMI cable from the Google TV Streamer to any available HDMI Input (HDMI2/MEDIA PLAYER", etc.) on the back of your Denon AVR-X1400H receiver.
- Why this connection: The Google TV streamer does not require 4K/120Hz or VRR. Connecting it to the Denon allows the receiver to handle its audio decoding (including Dolby Atmos from streaming services via Dolby Digital Plus) and pass the 4K/60Hz HDR video to your TV.
- Denon AVR-X1400H to Samsung QN90D (Single Cable for Audio & Other Video):
4. Add 4th cable to to HDMI 4 on TV for future upgrade
- Connect a high-speed HDMI cable (supporting ARC) from the HDMI OUT (ARC) port on your Denon AVR-X1400H to the HDMI ARC/eARC port(Port 3) on your Samsung QN90D TV.
- Why this connection:
- This single cable sends the video from the Google TV Streamer (which is connected to the Denon) to your TV.
- Crucially, the ARC (Audio Return Channel) feature allows audio from your PS5 (which is connected directly to the TV) to be sent back from the TV to the Denon receiver for playback through your 3.1 speaker system.
- It also allows audio from your TV's built-in smart apps (if you use them) to be sent to the Denon for playback.
3. Important Configuration Steps
After making the physical connections, configure your devices:
On Your Denon AVR-X1400H:
- Power On the receiver.
- Press the "Setup" button on your Denon remote to bring up the on-screen menu on your TV.
- Input Assignment: Ensure the HDMI input you used for the Google TV Streamer is correctly assigned and named (e.g., "Streamer").
- Speaker Setup: During the setup, indicate that you have a "3.1" speaker configuration. The receiver will guide you to confirm your Front Left, Center, Front Right, and Subwoofer speakers.
- Audyssey MultEQ XT Calibration:
- Plug the Audyssey microphone into the front of the Denon receiver.
- Follow the on-screen instructions to place the microphone at your main listening position and several other spots.
- This process is critical for:
- Balancing speaker volumes.
- Setting correct speaker distances/delays.
- Determining optimal crossover frequencies for your 3.1 setup (ensuring your subwoofer handles low frequencies and your main speakers handle mid-range/treble effectively).
- Applying room equalization for the best sound quality in your specific room.
- HDMI Control (CEC): Enable "HDMI Control" or "CEC" in the Denon's setup menu to allow devices to communicate (e.g., turning on one device turns on others).
On Your Samsung QN90D TV:
- Power On the TV.
- HDMI-CEC (Anynet+): Go to your TV's settings and enable "Anynet+" (Samsung's name for HDMI-CEC). This allows the TV to control the Denon and other connected devices.
- Audio Output: In the TV's audio settings, set the digital audio output to "HDMI ARC" or select your "Receiver" as the audio output device, rather than "TV Speakers".
- Digital Output Audio Format: For the best audio quality from your PS5 (and TV apps) being sent to the Denon via ARC, set the TV's digital output format to Dolby Digital. ARC doesn’t support DD+ and DD is most reliable
- Input Signal Plus (or similar): For the HDMI input where your PS5 is connected, enable "Input Signal Plus" or a similar setting in your TV's picture/input settings. This ensures the TV is ready for enhanced HDMI signals like 4K/120Hz and HDR.
On Your Sony PS5:
- Power On the PS5.
- Go to Settings > Screen and Video.
- Resolution: "3840x2160 (4K)".
- Enable HDR: Ensure this is turned "On".
- Enable 120hx output, VRR, ALLM: On
- Go to Settings > Sound > Audio Output.
- HDMI Device Type: Select "AV Receiver."
- Audio Format (Priority): Choose "Bitstream (Dolby)" or "Bitstream (DTS)". This will send a compressed multi-channel audio signal to your TV, which will then send it over ARC to your Denon. The Denon will decode this into your 3.1 surround sound.
- Enable HDMI Device Control (CEC): On
On Your Google TV Streamer 4K:
- Power On the streamer.
- Navigate to its audio settings.
- Ensure the audio output is set to a format that allows for surround sound (e.g., Dolby Digital Plus, Passthrough, or Auto) to be properly sent to your Denon receiver. Auto is probably best
- HDR=Enable Dolby Vision or HDR
In my last house, I took pictures of the wiring before they hung the drywall and also wired for 7.1 just in case I ever wanted to upgrade. Looking back, I should have used conduit but it's history now.Some great info. here, be sure to get some audio cable labels, dirt cheap, and label each cable before you plug it in to the receiver. If you have multiple speakers it helps a lot to have all cables labeled if you ever have to switch out the receiver or move it to a new location. Nothing worse than trying to figure out what cable goes to what speaker or component when a dark cramped space and try to plug it in.
I found a good deal on an 85" TV but it's not going to arrive for a few weeks, so I'm trying to get everything ready. I didn't have a lot of choices because the house was mostly done, but I did have the builder put in some deck speakers and the cables go to this unfinished portion of the basement. I'm going to power those with this wiim amp, which I highly recommend. I have no clue what the green wire does that is coming out of this wall.


Last edited:
Just a lot easier to run cables before the dry wall is installed, and then just put a box where you want it to come out from the wall. Very cheap to do it before dry wall, pain in the butt afterward. It's also better to wire everything for speakers even if you are not using a 7-1 system right now, nothing like future proofing a home you plan on being in for awhile.In my last house, I took pictures of the wiring before they hung the drywall and also wired for 7.1 just in case I ever wanted to upgrade. Looking back, I should have used conduit but it's history now.
I found a good deal on an 85" TV but it's not going to arrive for a few weeks, so I'm trying to get everything ready. I didn't have a lot of choices because the house was mostly done, but I did have the builder put in some deck speakers and the cables go to this unfinished portion of the basement. I'm going to power those with this wiim amp, which I highly recommend. I have no clue what the green wire does that is coming out of this wall.
View attachment 151761
View attachment 151762View attachment 151765
That green wire in the photo, could be anything, that is why it's important to label everything while they are installing them. Pros will label, the average company just wants to get the wire in and dry walled over.
My wife and I want to get a projector so we can watch movies outside with the kids but then it will also be the source of my sports streaming in the shed when I tinker around.
Any recommendations?
The cheaper ones can't be used with much daylight. We've got the one below and have done some outdoor movies at sunset with the neighborhood kids. It works well for what we use it for but the room needs to be dark. Got it from Best Buy.
I'd also recommend getting to a level with zoom. This one does not. We just got lucky that everywhere we put it, it seems to fit well.
It really depends on how much you want to spend.
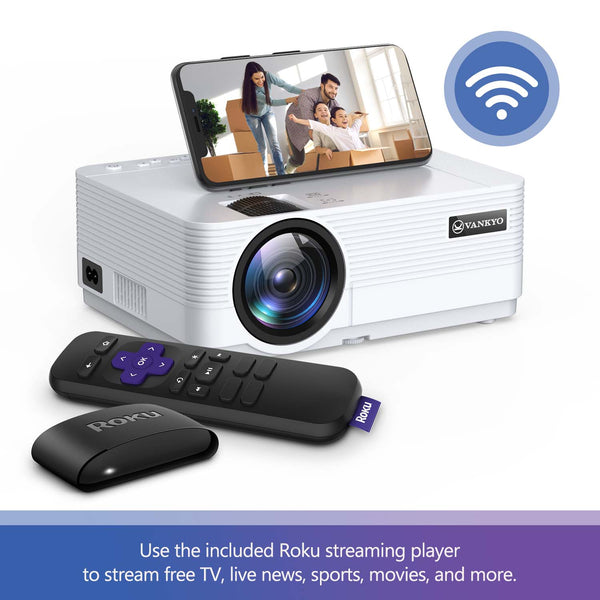
VANKYO Leisure 470 Native 720p Mini Projector with Roku Express
VANKYO Leisure 470 HD Mini Projector with Roku Express Streaming Player, 50000 Hrs LED Life, 200'' Display Screen for Home Theater & Outdoor Movies
 ivankyo.com